Ultimate Silicone Caulk Guide for Clean, Waterproof Seals
You finish renovating your Melbourne bathroom, step back to admire the work, then notice thick, messy caulk lines around the shower that look like an amateur did the job. Worse, six months later that same silicone caulk has turned black from mould or started peeling away from tiles. Most homeowners grab whatever tube is cheapest at Bunnings, apply it poorly, then spend years living with ugly results or paying tradespeople to fix their mistakes.
Here is what you actually need to know about silicone caulk choosing the right product for each application, using proper tools for professional-looking results, and most importantly, removing old failing sealant without damaging your expensive tiles or fixtures. This guide covers everything from understanding different silicone types to mastering removal techniques that actually work in Melbourne bathrooms and kitchens.
What Is Silicone Caulk and Where Should You Use It?

Silicone caulk is rubbery, moisture resistant, silicone-based polymers, which is perfect in bathrooms, kitchens, windows, and other places that need moisture protection, sunlight resistance, and the ability to bond with most materials despite temperature changes.
I would like to be straight to the point and what makes silicone caulk superior to the rest of the sealants. It is molded out of silicone polymers which do not crack during movement of the temperature in Melbourne between 5 o C and 40 o C. In comparison to the acrylic caulk, which disintegrates in reaction to UV light and moisture, silicone retains its waterproof coating of up to 1520 years when used appropriately. This longevity has a price – silicone is also incapable of being painted and this restricts its applications.
Caulking silicone is versatile because it is capable of adhering to glass, tile, metal and plastic without any primers. This is ideal in bathrooms where shower screens are in contact with tiles, kitchen splashbacks, window frames, and any other place where exposure to water is required to be superior. The elasticity is imperative – it allows the flexibility to accommodate swellings and contractions that would separate hard sealants in a couple of months.
Key Benefits of Caulking Silicone in Modern Homes
The advantage of silicone caulking is that it is a better waterproofing material, it also resists moulding, flexible with change in temperature, stable under UV light, adhesive to a wide range of surfaces and it lasts 15 years up to 20 years neglecting the costly acrylic caulking.
The argument of caulking silicon in Melbourne houses is simple. The life of a 15-year-old tube is 15 years against the 18 months of life of a 6-dollar tube made of acrylic. In more than ten years, the cheap goods would cost the labour with five times as much and the possible damage to water. The first premium covers itself in terms of longevity and performance.
- The advantages why silicone would be a better choice than others:
- Excellent waterproofing – ideal when it is always wet.
- Mould resistance — inhibitors stop the growth of black in the damp areas.
- Temperature bending – works 5-40 o C without breaking.
- UV stability- Melbourne sun does not destroy quality silicone.
- Multi-surface adhesion – attaches to glass and tile, metal and plastic.
Best Areas to Apply Bathroom Silicone Caulk
Apply bathroom silicone caulk at shower base perimeters, around bathtubs, sink edges, tile joints, glass shower screens, and any gap where water exposure demands waterproof, mould-resistant sealing.
The critical areas for bathroom silicone caulk in Melbourne homes:
- Shower base perimeter where acrylic meets tiles
- Bathtub edges and corners prone to water pooling
- Around vanity tops preventing water damage to cabinets
- Tile expansion joints accommodating movement
- Glass shower screens and door frames
Types of Silicone Caulk (Clear, Coloured, and Specialty Options)

Silicone caulk types include clear for invisible seals, white for bathrooms, coloured to match tiles, mould-resistant for wet areas, and specialty formulations for aquariums, high-temperature, or food-contact applications.
Standing in the Bunnings caulk aisle reveals dozens of silicone caulk options, but most Melbourne DIYers only need three types: clear for glass and fixtures where you want invisible seals, white for standard bathroom applications, and mould-resistant for high-humidity areas. Understanding these core options prevents buying specialty products you do not actually need.
The confusion comes from marketing labels like “kitchen and bath,” “all-purpose,” or “premium” that do not clearly indicate actual differences. What matters is the formulation — 100% silicone versus hybrid blends, mould inhibitors present or absent, and cure time affecting how quickly you can use the area after application.
When to Choose Clear Silicone Caulk for Clean Finishes
Choose clear silicone caulk when sealing glass shower screens, aquariums, skylights, or any application where visible caulk lines detract from aesthetics — providing waterproofing without disrupting visual flow.
The advantage of clear silicone caulk is invisibility. On glass shower screens, clear sealant disappears while white creates obvious lines. Around chrome fixtures, clear maintains the sleek look. The trade-off is that clear shows dirt and soap scum more readily than white, requiring more frequent cleaning in Melbourne’s hard water areas.
Best applications for clear silicone caulk:
• Glass shower screens and frameless enclosures
• Skylights and glass roof panels
• Aquarium seals and waterproofing
• Chrome or stainless fixtures where white looks wrong
Waterproof vs Mould-Resistant Silicone Caulking
All silicone caulking is inherently waterproof. Mould-resistant versions add anti-microbial agents preventing mould growth in constantly damp bathrooms — essential for Melbourne’s humid climate and poorly ventilated spaces.
Every bathroom silicon caulk is waterproof by nature — that is what silicone does. The distinction is whether it contains mould inhibitors preventing black growth in damp conditions. Standard silicone without these additives will grow mould in Melbourne bathrooms with poor ventilation. Always choose mould-resistant formulations for wet areas.
Product selection for Melbourne conditions:
• Mould-resistant: Essential for showers, baths, poorly ventilated bathrooms
• Standard: Acceptable for windows, dry areas, temporary seals
• Kitchen-grade: Food-safe additives for splashbacks and benchtops
Tools You Need for Perfect Silicone Caulking Results

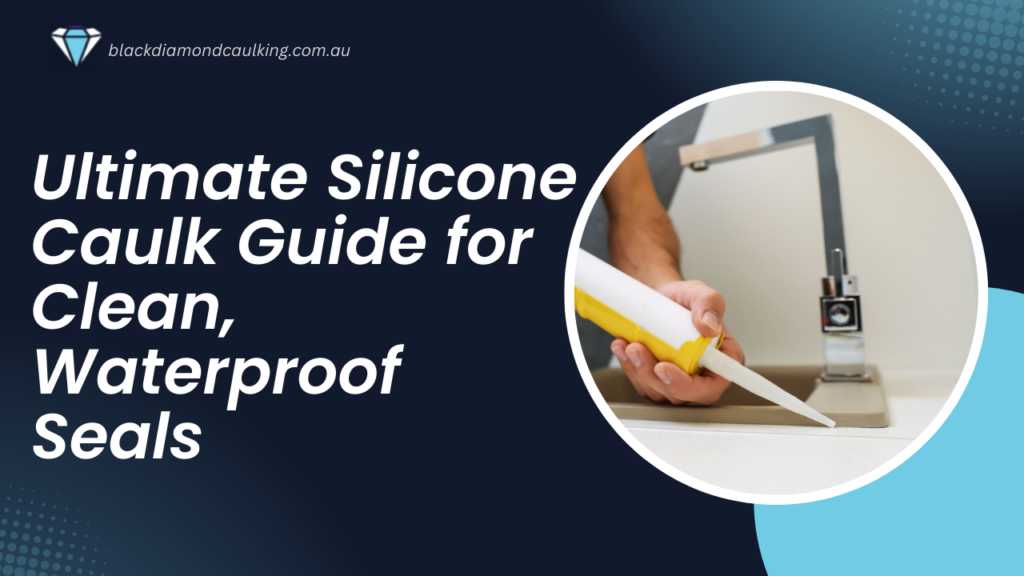
Essential silicone caulking tools include a smooth-rod caulk gun, utility knife, painter’s tape, silicone caulking tool or wet finger, clean rags, and methylated spirits for cleanup and surface preparation.
Professional results with silicon caulk depend more on tools than technique. A quality caulk gun with smooth pressure control produces consistent beads. Cheap ratchet guns create stops and starts that ruin the seal. Invest $25 in proper equipment — the difference in results justifies the cost immediately.
Complete toolkit for caulking silicone projects:
• Smooth-rod caulk gun — not ratchet type
• Silicon caulking tools set for professional finish
• Sharp utility knife for removing old caulk
• Painter’s tape for crisp, clean edges
• Methylated spirits for surface cleaning
• Clean rags for immediate spill cleanup
How to Use a Silicone Caulking Tool Like a Pro
Use a caulking tool by selecting the appropriate profile, running it along the freshly applied bead within 5 minutes, maintaining consistent pressure, and working in one smooth motion for professional-looking seals.
A silicon caulking transforms amateur work into professional results. These inexpensive plastic tools ($8–$15) feature different profiles for various joint sizes. Apply your caulk bead, then immediately run the tool along it with steady pressure. The shaped edge creates perfect concave profiles that shed water naturally.
Technique for silicon caulking tool perfection:
1. Use caulk fully filling the joint.
2. Profiles Select a tool that matches your gap width.
3. Smooth gliding Dip tool in soapy water.
4. Continuous motion Run tool over bead.
5. Clean tool between strokes with wiping.
Essential Prep Materials Before Applying Caulk
Prepare for caulking by gathering removal tools, cleaning supplies like sugar soap, surface degreaser, painter’s tape, rags, and ensuring surfaces are completely dry before applying any silicone sealant.
Preparation materials prevent mid-project problems:
Removal Caulk remover or utility knife.
• Sugar soap for deep cleaning
Methylated spirits to be used in end degreasing.
• Painter’s tape for masking
• Hairdryer to hasten the drying of surfaces.
Step-by-Step Guide to Applying Silicone Caulk at Home
Apply silicon caulk by removing old sealant, cleaning surfaces, ensuring dryness, taping edges, cutting nozzle at 45 degrees, running steady bead, tooling immediately, removing tape while wet, and curing 24 hours.
Success with silicone caulk comes from following proper sequence. Most Melbourne DIYers rush preparation trying to save an hour, then spend years looking at poor results. The actual caulking takes 10 minutes per area. Removing old material, cleaning, and drying takes 2–3 hours. Skip preparation at your peril.
Complete application process:
- Remove all old caulk with knife or removal tool
- Clean joints with sugar soap, rinse, dry 24 hours
- Apply painter’s tape 2mm from gap edges
- Cut nozzle at 45 degrees matching gap width
- Apply steady bead pulling gun, not pushing
- Tool immediately with wet finger or caulking tool
- Remove tape while caulk remains wet
- Cure 24–48 hours before water exposure
Surface Preparation for Long-Lasting Adhesion
Prepare surfaces by removing all old caulk and residue, cleaning with degreaser, treating mould, ensuring complete dryness for 24 hours, and wiping with methylated spirits immediately before application.
The foundation of durable silicon caulk is surface preparation. Any contamination — soap scum, body oils, old caulk residue, moisture — prevents proper adhesion. Melbourne’s humidity makes drying critical. Surfaces must be bone-dry before caulking or moisture trapped underneath breeds mould and causes adhesion failure.
Preparation checklist:
- Wipe out all signs of ancient caulk – half baked will be sure to fail.
- Cleaning with sugar soap that eliminates all the soap scum and oils.
- Clean any mould using 30 seconds cleaner.
- 24-hour drying in the wet climate of Melbourne.
- Methylated spirits prior to caulking Final wipe.
Common Silicon Caulking Mistakes to Avoid
Common mistakes include applying over old caulk, working on damp surfaces, using wrong products for the application, running too-thick beads, not tooling immediately, and bathing before full cure.
Mistakes that ruin silicone caulk jobs:
• Caulking over old material instead of complete removal
• Applying to damp surfaces that prevent bonding
• Using non-mould-resistant products in bathrooms
• Running thick beads that skin over before curing
• Not smoothing within 5 minutes
• Water exposure before 24-hour cure completes
How to Get Silicone Caulk Off Safely and Easily

Get silicon caulk off by scoring both edges with a sharp utility knife, peeling the bead away, scraping residue with plastic tools, applying chemical remover for stubborn areas, and cleaning with methylated spirits.
The frustration with how to get silicon caulk off Melbourne bathroom surfaces is that silicone bonds incredibly well when properly applied — exactly what you want for sealing but not when removing. Old caulk becomes rock-hard after years of UV and temperature cycling. Complete removal demands patience, sharp tools, and sometimes chemical assistance.
Best Methods to Remove Old Silicone Caulk
Remove old silicone caulk by scoring both edges deeply with a fresh utility knife blade, carefully peeling the bead away from surfaces, scraping remaining residue, and using Selleys Silicone Remover for stubborn areas.
The technique for how to get silicon caulk off that works:
- Score both edges where caulk meets surfaces with sharp knife
- Slice underneath bead to separate from substrate
- Peel away carefully, working end to end
- Scrape residue with plastic scrapers on delicate surfaces
- Apply Selleys Silicone Remover gel for stubborn spots
- Wait 2–3 hours for chemical to soften caulk
- Scrape softened material, clean with methylated spirits
Cleaning Residue Without Damaging Surfaces
Clean silicone residue by scraping with plastic tools on tiles and acrylic, using chemical removers sparingly, wiping with methylated spirits, and avoiding metal scrapers that scratch expensive bathroom finishes.
Surface-specific approach for how to get silicone caulk off without damage:
• Glass shower screens: Plastic scraper then methylated spirits
• Ceramic tiles: Careful metal scraping acceptable
• Acrylic tubs: Plastic scrapers only, never metal
• Chrome fixtures: Chemical remover with soft cloth
Conclusion
Silicone caulk provides good waterproofing, mould resistance and long-term sealing of the bathrooms and kitchen upon application. The selection of caulking silicone, the correct preparation of the surfaces, and the use of a good silicone caulking tool can guarantee the proper and cleaning outcomes which may last 15 years or more. And whether you will put in place new sealant or you are to know how to remove silicone caulk from past joints, it is better to follow the correct technique to avoid water damage, mould growth, and overall premature seal failure.
Now that you know how to choose, apply, and remove silicon caulk properly, ready to tackle your bathroom renovation with professional-quality results? [Get Your Melbourne Caulking with Black Diamond Caulking ]